
Lumos Ultra Unboxing & Quick Setup Guide
Note:
Before you begin setting up, check that the carton is intact after receiving it. If there is severe visible damage to the box, take photos before opening.
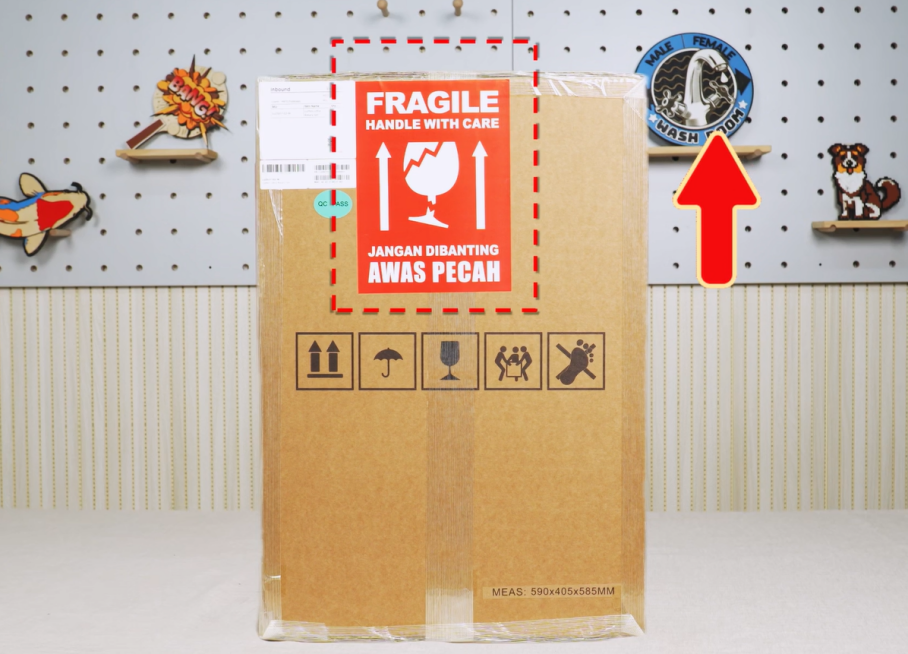
Step 1: Unboxing
- Open the box: Cut the outer plastic straps and open the top flaps.
- Remove calibration boards: Take out the wooden boards packed in the plastic bag at the top.
- Extract the machine: Take out the inner foam box. Cut the plastic straps securing it, then lift the top half of the foam box upward.
- Remove protective wrappings: Take off the large plastic bag covering the machine.
- Inspect the machine: Check the Lumos Ultra for any external damage.
Note: If any damage is found, stop using the machine immediately and contact customer support.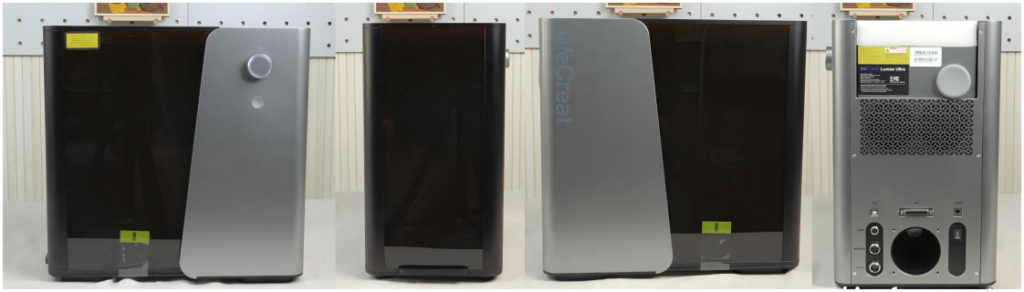
- Remove internal packaging:
– Remove the top foam piece sitting on the machine.
– Peel off the safety tapes on both sides of the front lid.
– Lift the lid and remove the middle foam block from inside the workspace. - Install the working panel: Take the metal working panel out of its plastic wrap and place it flat into the bottom of the machine’s workspace.
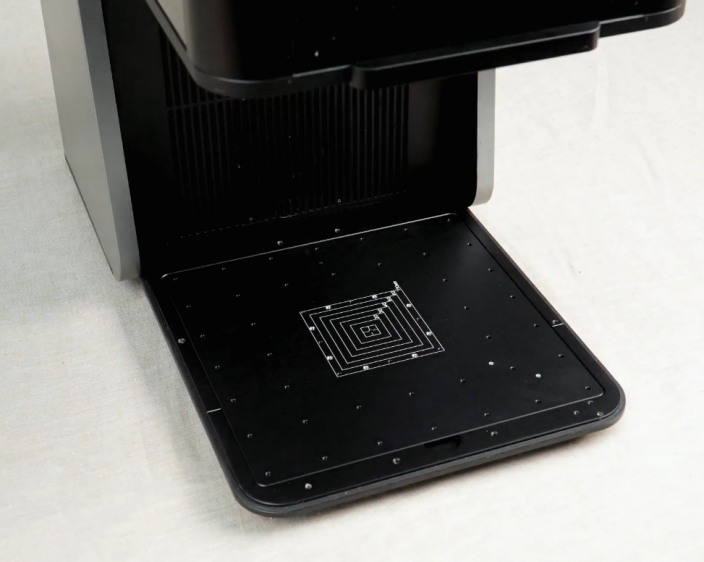
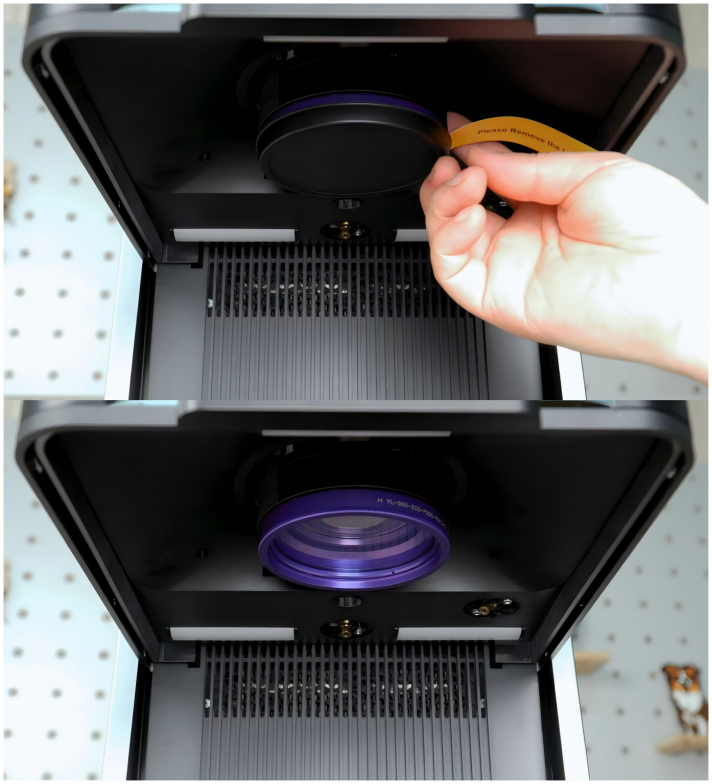
- Remove the lens protector: Carefully peel away the protective sticker/cap covering the laser lens inside the machine.
What’s in the Box
Main Components & Cables:
- WeCreat Lumos Ultra machine
- Power cord & Power adapter
- Exhaust hose & Hose connector
- Wooden boards (used for camera calibration and your first test)
- Working panel
- Cutting slats
Rotary Set & Accessories (may ship separately):
- Rotary set & Rotary holder
- Metal plate
- Green field lens
- Positioning piece
- Y-shape alignment jig
- USB cable
- Rotary attachment accessories: Threaded studs, single-step claws, tape measure, silicone studs, silicone grips, universal wheel holder, spare screws, and a level.
Toolbag 1:
- Screwdrivers (Flathead, Phillips, and Hex)
- Panel support legs
- USB-C adapter
- Spare screws
Step 2: Setting up the Machine
- Attach the exhaust connector: Locate the hose clamp and the black plastic hose connector. Align the screw holes of the connector with the exhaust port on the back of the machine. Secure it tightly using the provided screwdriver and screws.
- Attach the exhaust hose: Slide the hose clamp onto the end of the exhaust hose. Push the hose onto the back connector and use a screwdriver to tighten the clamp so the hose won’t slip off.
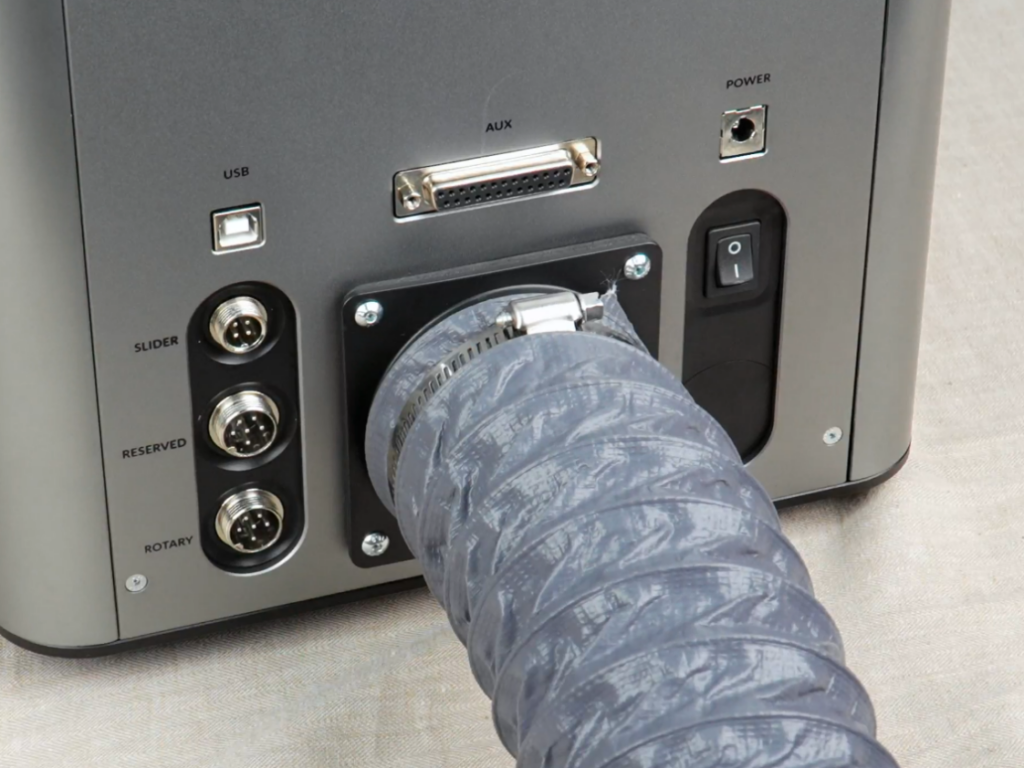
- Ventilate: Direct the other end of the exhaust hose outside through a nearby window.
- Connect power: Connect the power cord to the power adapter. Plug the circular end of the power adapter into the “POWER” port on the back of the machine. Plug the other end into a wall outlet or surge protector.
- Power it on: Flip the power switch on the back of the machine.
Important: Allow the machine to preheat for one minute before attempting any operations.
Step 3: Connecting to Software
- Plug in the USB: Insert the square end of the USB cable into the “USB” port on the back of the Lumos Ultra.
- Connect to your computer: Connect the standard USB end into your laptop or desktop computer. (Use the included USB-C adapter from Toolbag 1 if your computer only has USB-C ports).
- Launch Software: At this point, you will need to open the WeCreat software on your computer and pair your machine. You can download the software using the link below. Please make sure you are using version 3.0.6 or later.
https://wecreat.com/pages/software
Step 4: First Test Run & Focusing
- Place your material: Lift the lid and place one of the included wooden boards exactly in the center of the working panel.
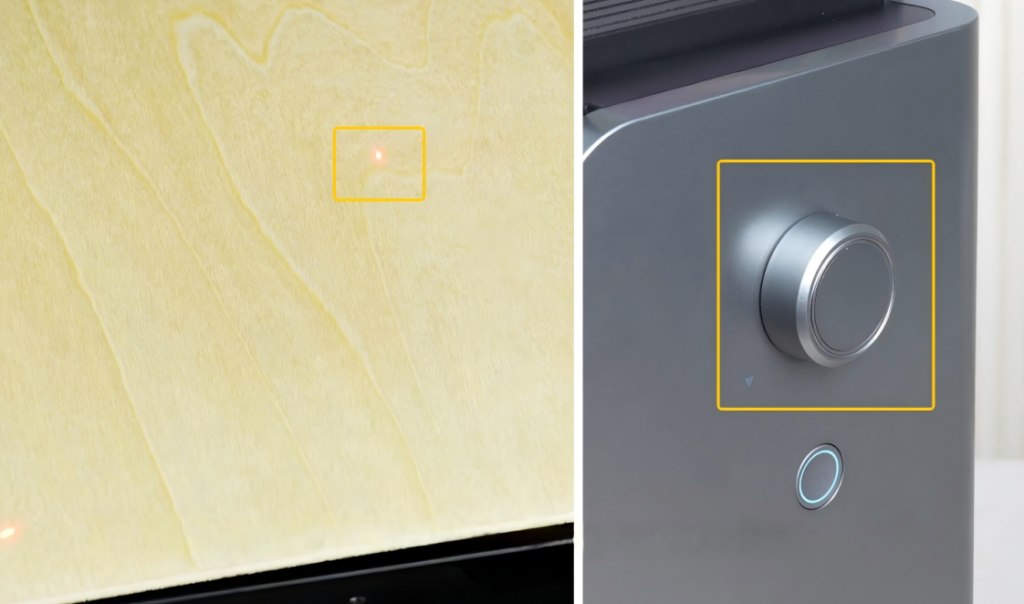
- Focus the laser: Look at the red laser dots shining on the wood. Turn the silver knob on the front right side of the machine until the two red dots perfectly overlap into a single dot. This means the laser is perfectly focused for the thickness of your material.
- Start creating: Close the lid. You are now ready to send your first design from the software to the laser!
Important Tips & Reminders
To keep your machine running smoothly and safely, keep these best practices in mind:
- Keep Your Box: Your warranty is voided if the machine is returned without the original packaging. Flatten the cardboard boxes and store the foam inserts in a closet or garage.
- Safety First: Do not open the lid while the laser is actively firing. Always ensure your exhaust hose is securely vented outside or through fume extractor, as cutting materials like wood and acrylic produces harmful smoke and fumes.
- Check Your Cables: Make sure the USB and power cables are fully inserted. A loose USB cable is the most common cause of the machine disconnecting from the software mid-engrave.
- Maintenance Tip (Lens Cleaning): Smoke and debris will eventually cloud your laser lens, reducing cutting power and potentially causing fires. Get into the habit of gently wiping the lens with an electronics-grade microfiber cloth or a specialized lens wipe after every few heavy uses.
- Material Fire Hazard: Never leave the laser cutter unattended while it is running. Keep a small fire extinguisher nearby just in case.