
How to Install MOPA Device and Fullfill Relief Engraving
Part 1: Hardware Installation
The MOPA module is an external power source that connects to the Lumos Ultra, enabling color engraving on stainless steel and deep relief on metals.
1. Component Checklist
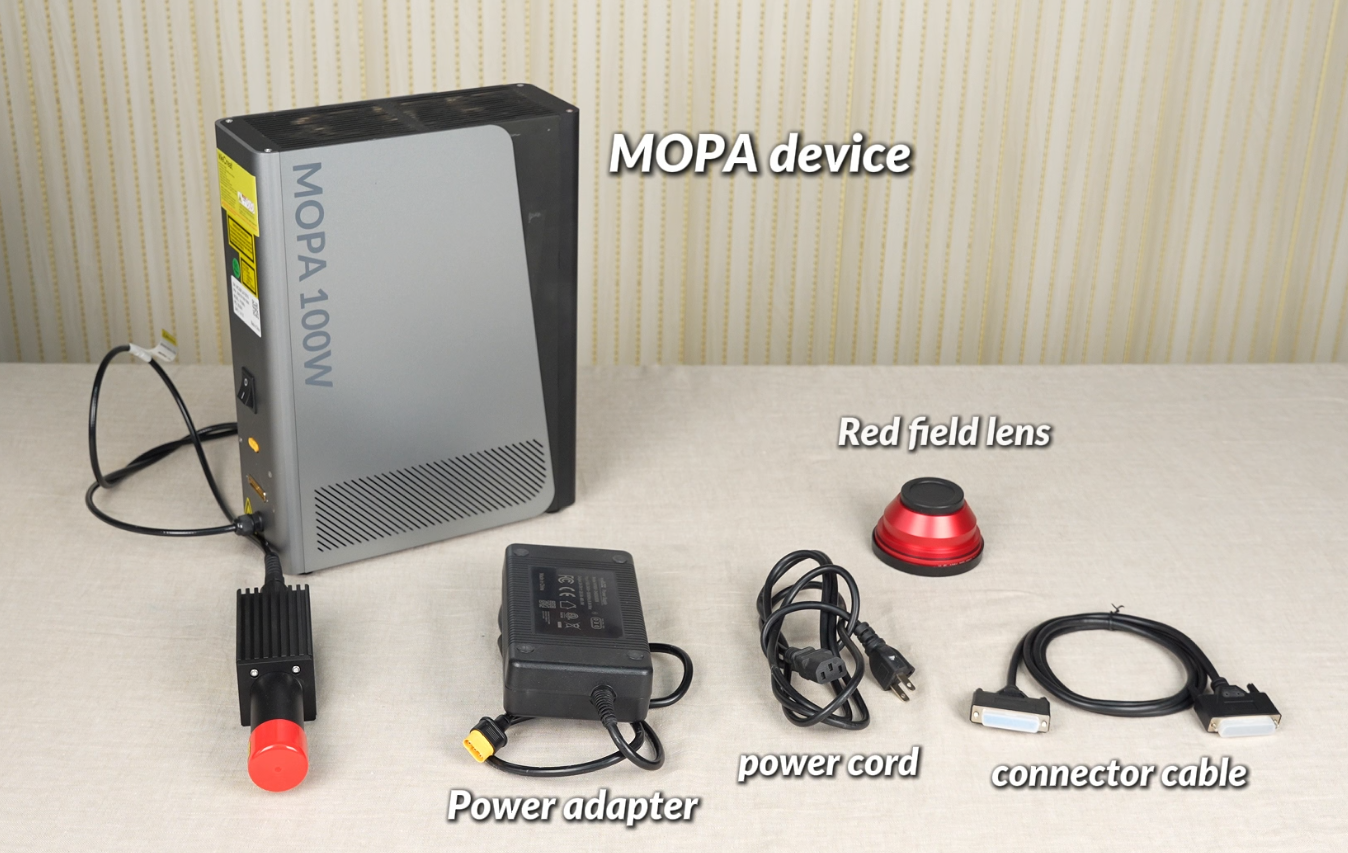
Before you begin, make sure you have the following items:
- MOPA Device
- DB25 Data Cable (wide multi‑pin connector)
- Red Field Lens (specific to MOPA wavelength)
- MOPA Power Adapter & Power Cord
2. Rear Port Connections
Note 1: Before operation, please make sure the power switches on both devices are in the OFF position. This prevents accidental power‑up during installation, which could cause damage to the electronic components or the fiber optic cable, and also helps avoid unexpected laser emission that might lead to personal injury or equipment damage.
Note 2: Do not bend or kink the black protective hose extending from the back of the MOPA module, as it contains the fiber optic cable connecting the MOPA module to the UV machine.
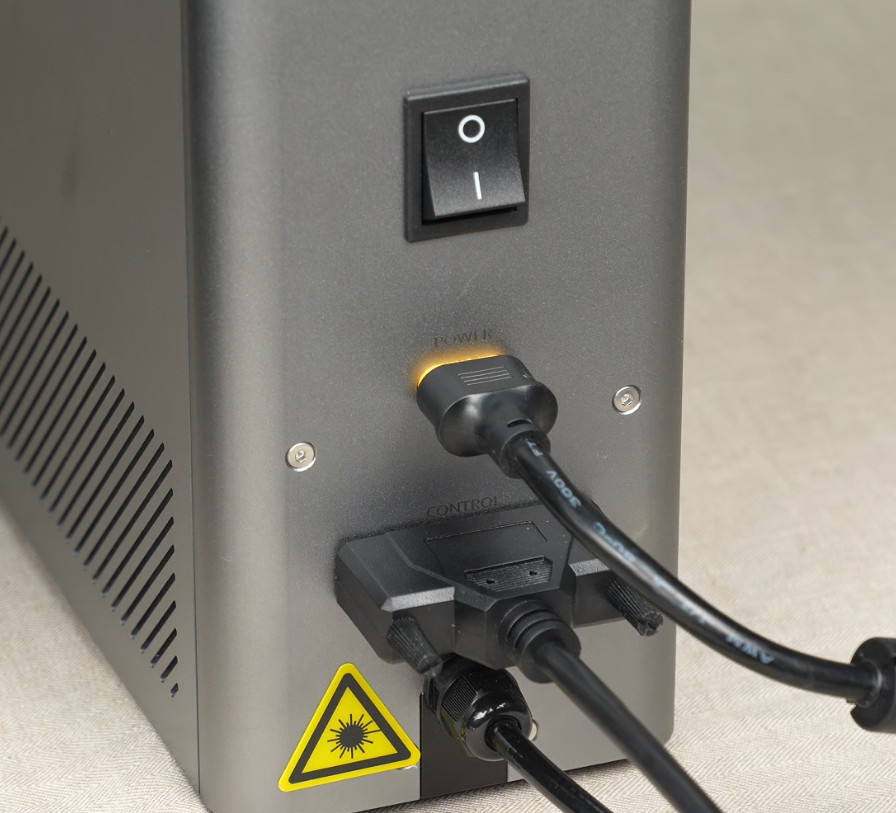
1. Isolator port – On the back of the Lumos Ultra, flip open the grey circular dust cap.
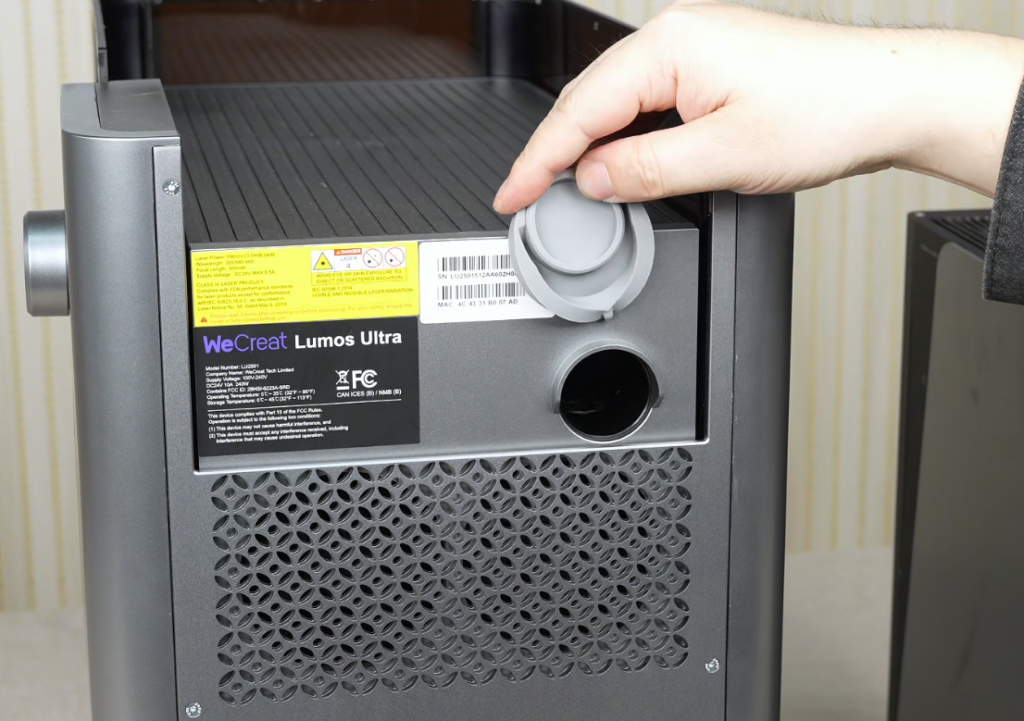
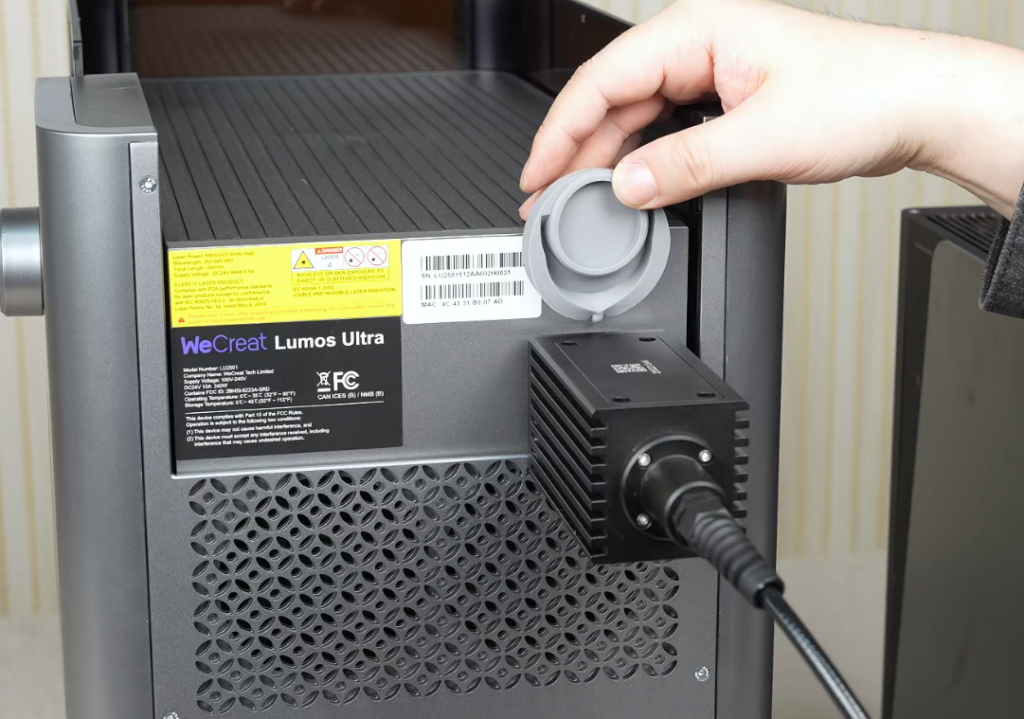
2. Insert the isolator – Remove the red protective cap from the MOPA isolator, then insert the optical isolator into the port on the back of the machine.
3. Data link – Connect the DB25 cable to CONTROL port on the MOPA device and the AUX port on the back of the Lumos Ultra and to the. Secure the thumb screws.
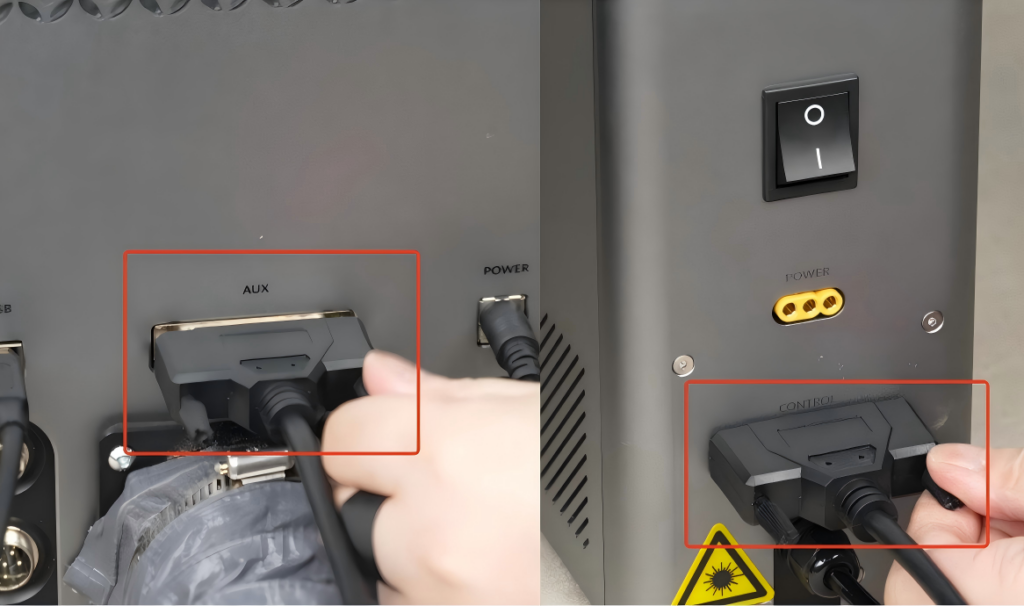
4. Power – Plug the power cord.
3. Internal Lens Swap
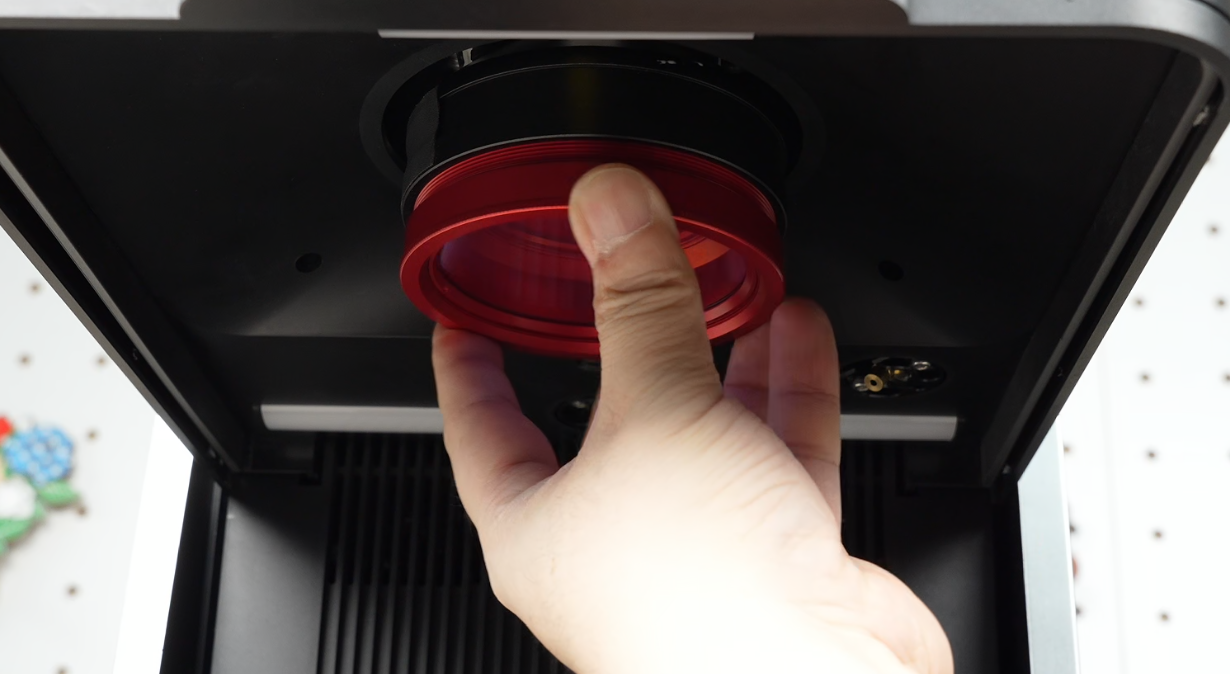
You must change the field lens inside the machine to work with the MOPA laser wavelength.
- Open the lid. Reach up to the laser head and unscrew the purple (UV) field lens.
- Take the red (MOPA) field lens and remove the plastic protectors from both sides of the glass.
- Screw the red lens into the laser head clockwise.
Part 2: Software Setup & Focusing
- Power sequence – Turn on the Lumos Ultra first, then flip the power switch on the back of the MOPA control box.
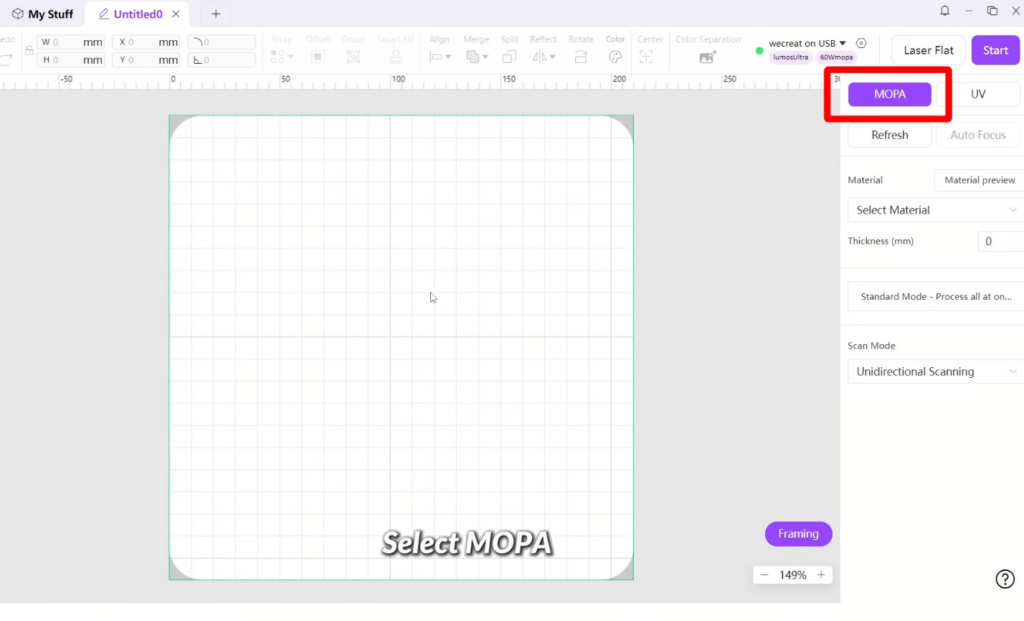
2. Mode selection – In the MakeIt software, select MOPA.
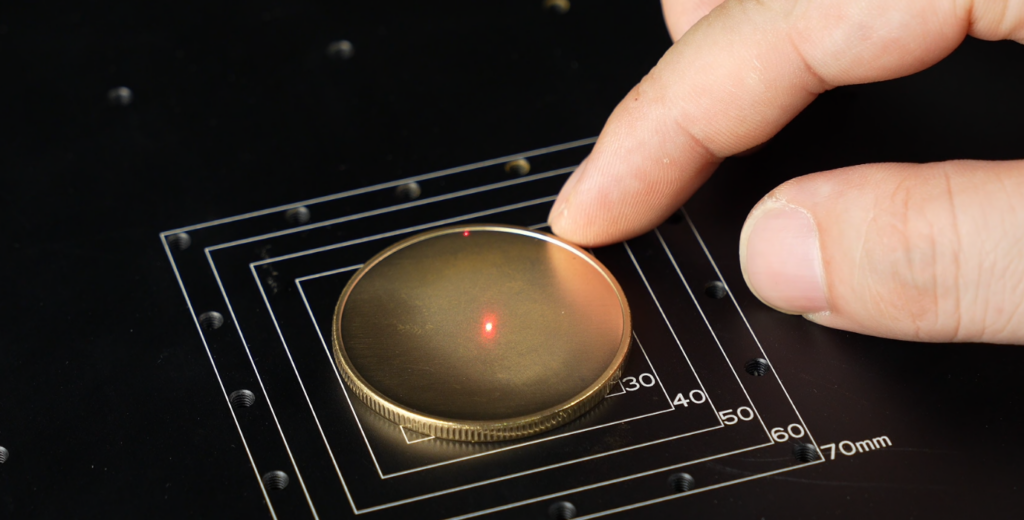
3. Material placement – Place your metal coin or blank on the honeycomb bed.
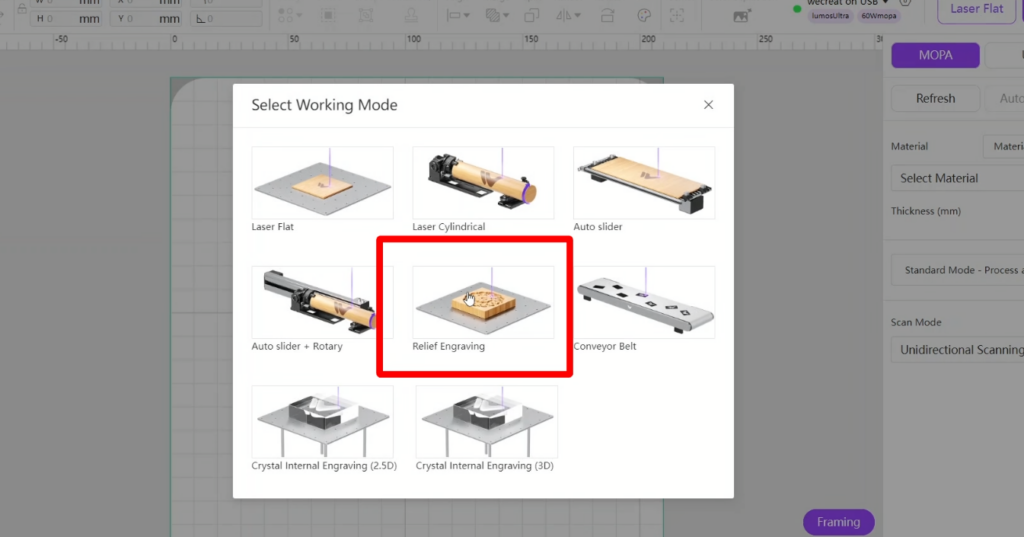
4. Change Mode: In the top right corner, click on the mode selector (which defaults to “Laser Flat”) and change it to “Relief Engraving”.
5. Refresh Canvas: Click the “Refresh” button in the right-hand panel.
6. Manual Focus: A notice will appear prompting you to focus the laser.
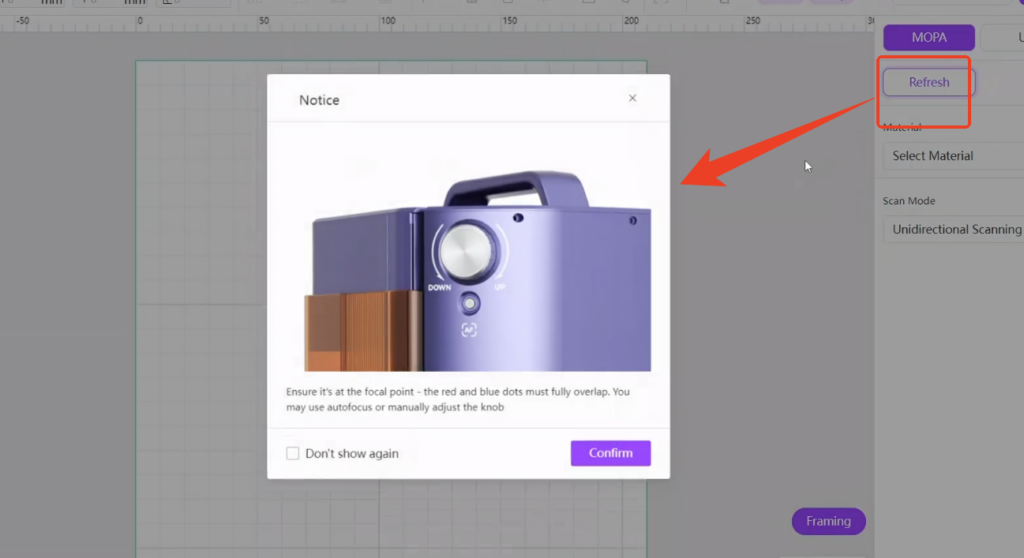
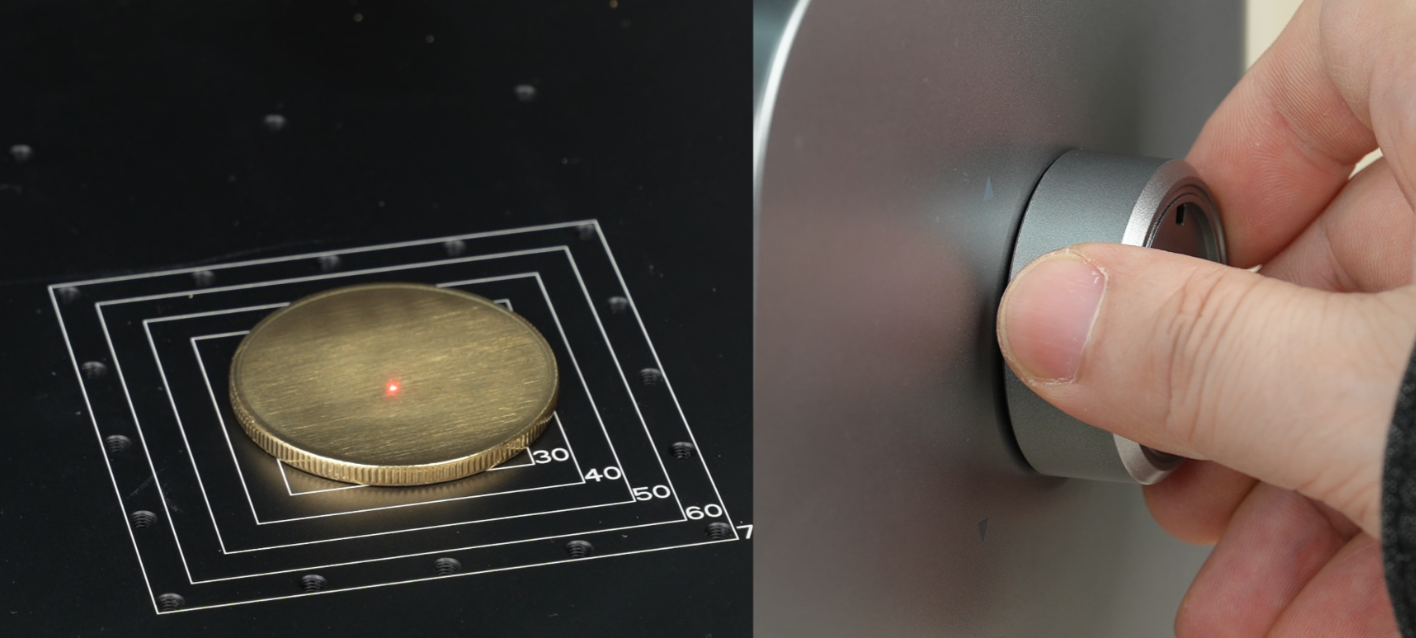
7. Dual‑dot focus – Turn the silver knob on the machine. You will see two red dots on the metal. Turn the knob until they overlap perfectly into a single dot.
Part 3: Design & Layer Configuration
Relief engraving uses the MOPA laser to remove multiple layers of metal, creating a physical 3D texture. Unlike standard engraving, this requires specific software modes and multiple “passes” to achieve depth.
1. Design Preparation
- Import a greyscale image or a high‑contrast depth map.
- Adjust the size and position of the design if necessary.
2. Parameter Settings
When you enable Relief Engraving Mode in the software, you can choose between Concave and Convex:
- Concave Mode – Darker areas engrave deeper (sunken effect), lighter areas stay closer to the surface.
- Convex Mode – Darker areas engrave less, lighter areas stand out (raised/embossed effect).
Note: The parameters below are for reference only. Actual results may vary depending on your specific material, machine calibration, and environmental conditions. Always run a small test on a scrap piece before starting your final project.
- Engraving mode: Convex
- Power: 100
- Speed: 500
- Frequency: 85
- Pulse Width: 250
- Line Density: 300
- Layers: to be determined based on desired depth
- Scanning Angle: Enabled by default (customizable, e.g., 27°)
- Z‑axis Descent Distance: Enabled
In Relief Mode, after each layer is engraved, the laser beam will lower by 0.01 mm (customizable), creating a more three‑dimensional effect.
Periodic cleaning pass (every N layers):
- Every N layers: 10
- Power: 30
- Speed: 3500
- Line Density: 300
- Frequency: 100
- Pulse Width: 350
After every 10 layers, the machine will automatically blow away surface debris and dust.
Double‑check that all settings are correct before proceeding.
3. Framing and Processing
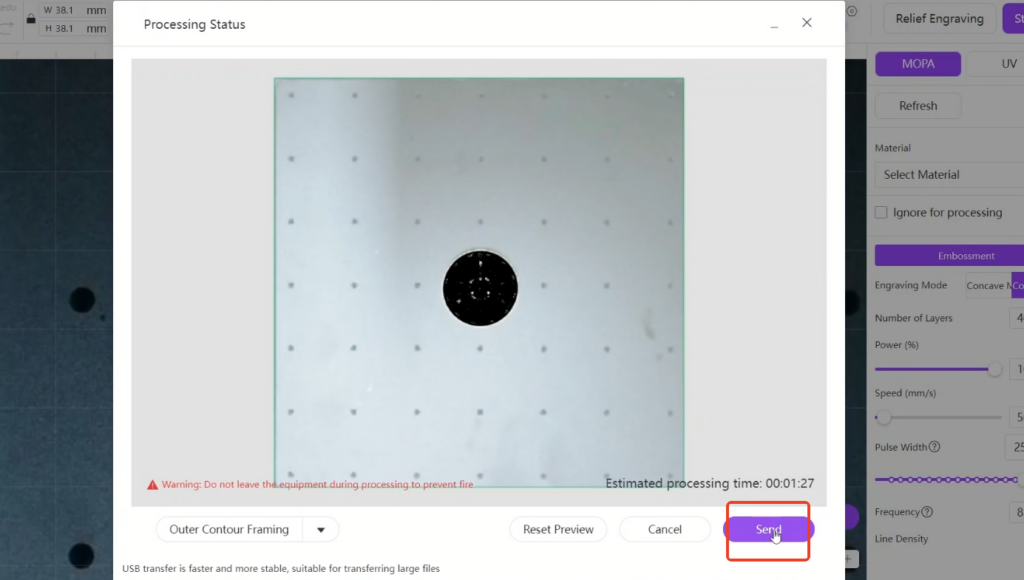
- After confirming the parameters, click “Start”.
2. Click “Outer Contour Framing” to check whether the processing area needs adjustment. If necessary, reposition the coin to ensure the engraving area stays within the material.
3. Click “Send”.
4. Press the “Start” button on the machine to begin processing.
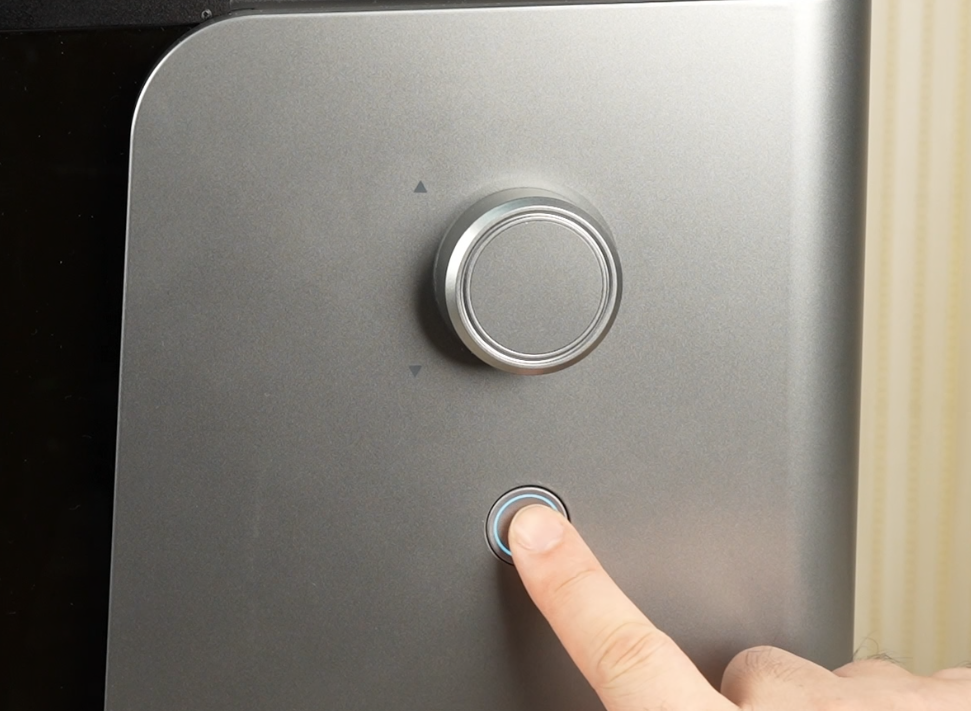
Then the engraving process will begin. Stay nearby to monitor the results, especially during the first few layers, and avoid leaving the machine unattended for long periods.
Important Tips & Safety Reminders
- ⚠️ Lens warning – Never fire the MOPA laser while the purple (UV) lens is installed.
- Heat management – Deep relief engraving generates significant heat in the metal. If the workpiece is small, let it cool for a minute before handling.
- Clean the lens – Metal vaporization creates fine metallic dust. Clean the red field lens with a microfiber cloth after every major relief project to prevent dust from baking onto the glass.