
How to Use the Rotary Attachment with Lumos Ultra
This guide details the process for setting up the WeCreat Lumos Ultra and MakeIt! software to engrave a design onto a cylindrical object, specifically a tumbler, using the Rotary Attachment.
Step 1: Prepare the Rotary Attachment
Before placing anything inside the machine, you need to assemble the Rotary Attachment.
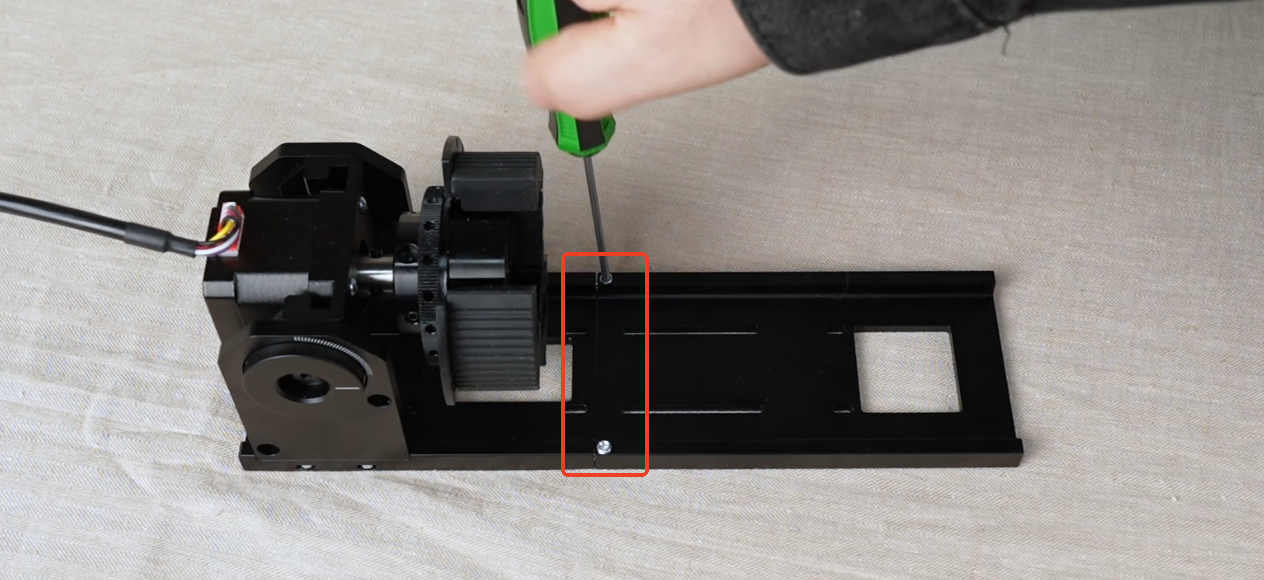
Install the Base Plate: Take the main rotary module and the metal base plate. Attach the base plate to the side of the module and secure it firmly using the provided screws and a screwdriver.
Step 2: Prepare the Material
Measure the Circumference: Use a flexible measuring tape to measure the circumference of your tumbler exactly in the area where you intend to engrave. Note this measurement down, as you will need it later in the software.

Step 3: Setup the Machine Workspace
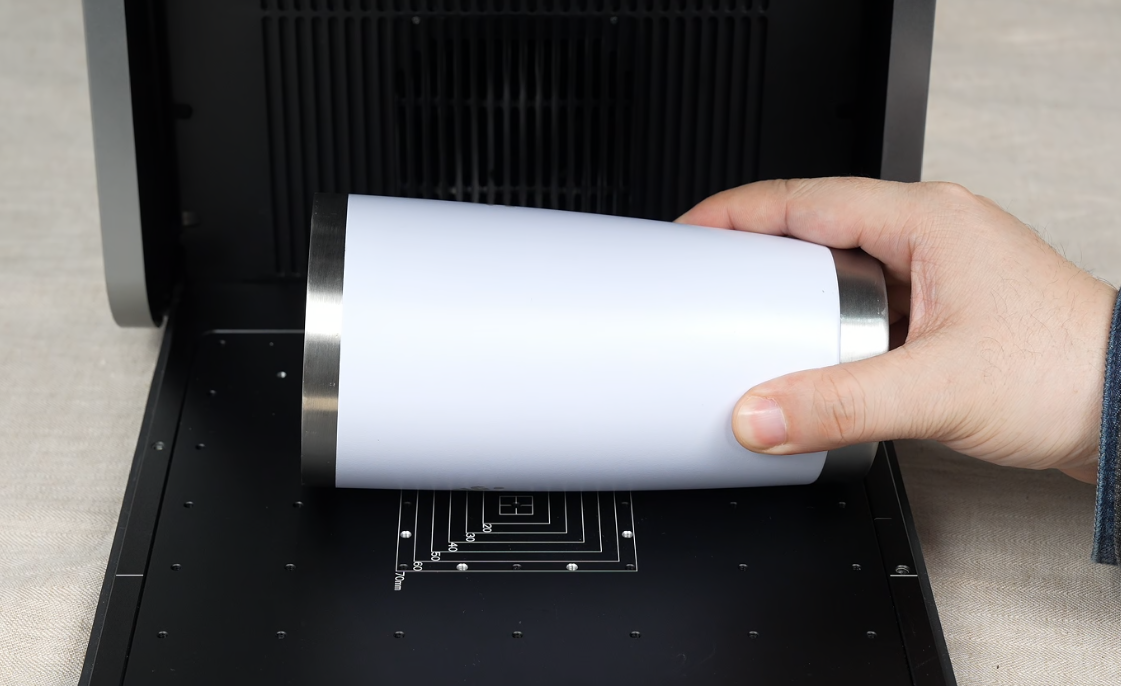
- Check Dimensions: Open the lid of the Lumos Ultra. Keep in mind that the standard working area of the machine is 210 * 210mm.
- Verify Fit: Temporarily place your tumbler horizontally on the working panel. Ensure that the specific area you want to engrave falls completely within the working area.
Step 4: Configure the Rotary Attachment
The Rotary Attachment needs to be adjusted to fit your specific object.
- Initial Placement: Place the assembled Rotary Attachment onto the working panel. Position it roughly where the tumbler will sit, ensuring it stays within the working area.
- Adjust the Chuck:
- Remove the tumbler.
- Move the rotary attachment backward along the base plate to accommodate the length of your tumbler.
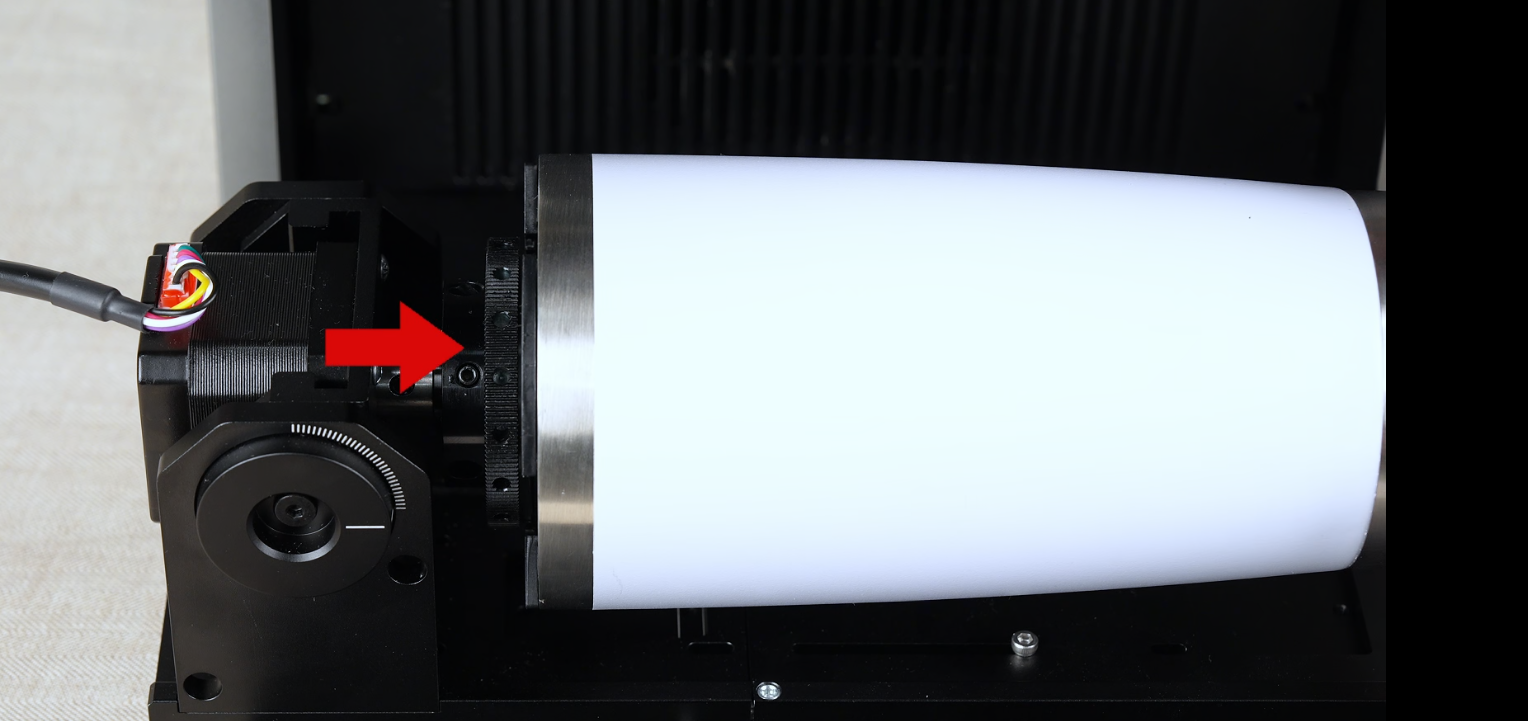
- Crucial Alignment: Ensure the edge of the rotary sliding mechanism aligns perfectly with the white guide lines printed on both sides of the base plate track. This ensures the rotary is square and level.
- Once aligned, secure the Rotary Attachment in this position using the provided screws.
- Secure the Tumbler:
- Place the tumbler back into the jaws.
- Rotate the gear on the side of the chuck to tighten the jaws and secure the tumbler firmly in place.
- Ensure the open mouth of the tumbler is pressed fully flush against the faceplate of the chuck.


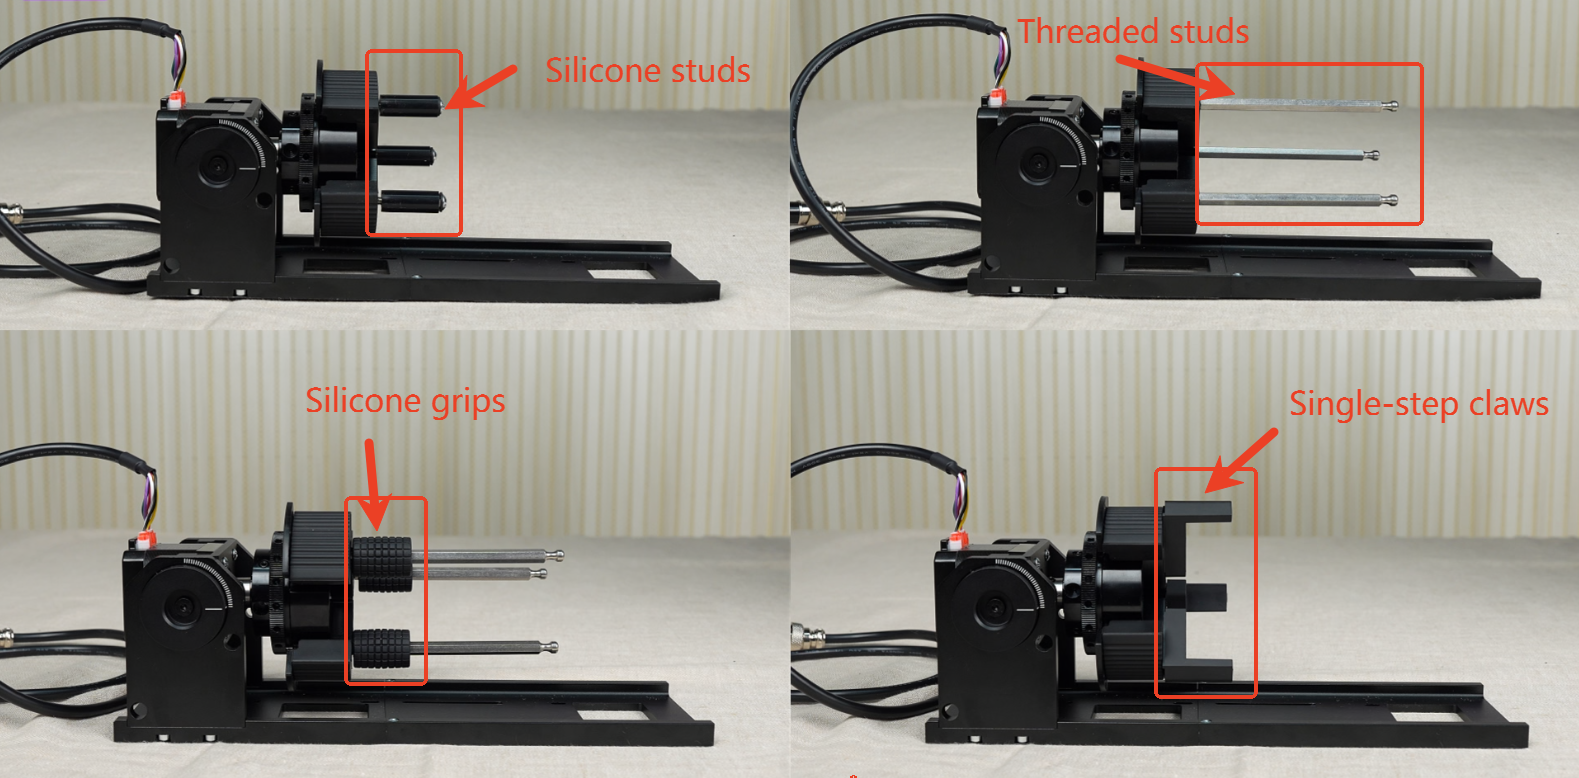
To accommodate different cylindrical or spherical objects—such as rings, bracelets, or spherical objects—we offer a variety of accessories, including threaded studs, single‑step claws, silicone studs, and silicone grips. These can be attached to the chuck as needed to match the diameter and shape of your object for a secure fit.
Step 5: Connect and Power On
- Connect Rotary Cable: Plug the cable from the Rotary Attachment into the port labeled “ROTARY” on Lumos Ultra.
- Power On: Plug in the main power cable and flip the power switch to turn the machine on. Connect the USB cable between the machine and your computer.


Step 6: Software Setup and Focus
- Launch Software: Open the WeCreat MakeIt! software on your computer and click “New Project”.
- Change Mode: In the top right corner, click on the mode selector (which defaults to “Laser Flat”) and change it to “Laser Cylindrical”.
- Refresh Canvas: Click the “Refresh” button in the right-hand panel.
- Manual Focus: A notice will appear prompting you to focus the laser.
- Look inside the machine at the surface of your tumbler; you will see two red laser dots.
- Turn the silver knob on the side of the machine until the two red dots converge and overlap perfectly into a single dot on the surface of the tumbler.
- Confirm Focus: Click “Confirm” in the software dialog box once the laser is focused.
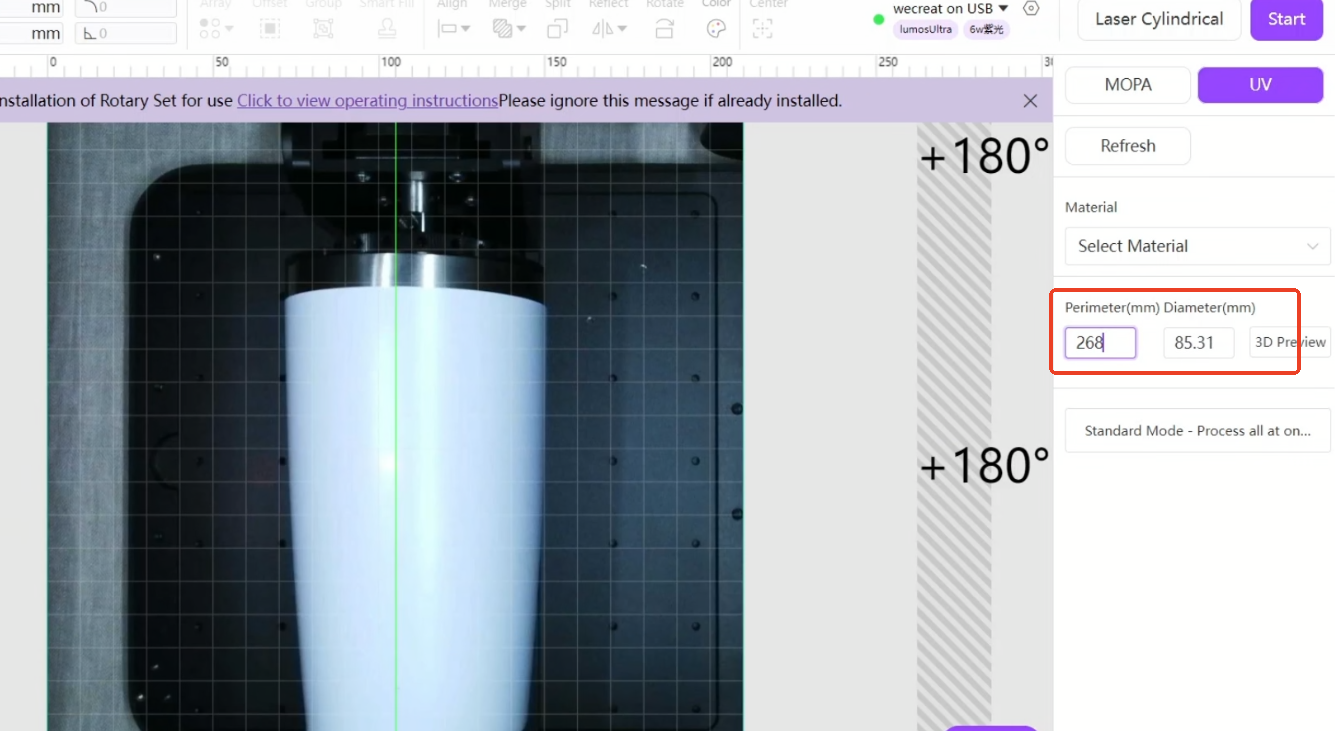
- Enter Circumference: In the software’s right-hand panel, locate the “Perimeter(mm) Diameter(mm)” input box. Enter the exact circumference measurement you took in Step 2. (Do not enter the perimeter and diameter in the wrong fields)


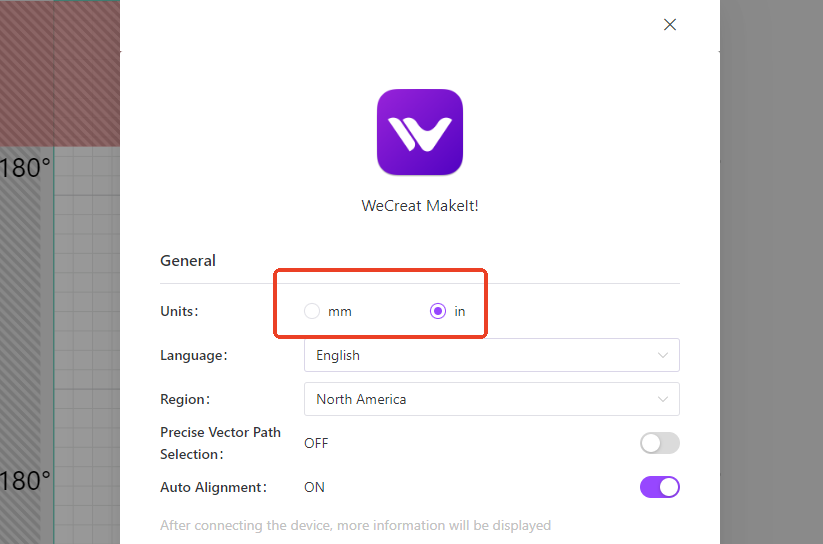
If you prefer working in inches, you can change the unit in Settings.
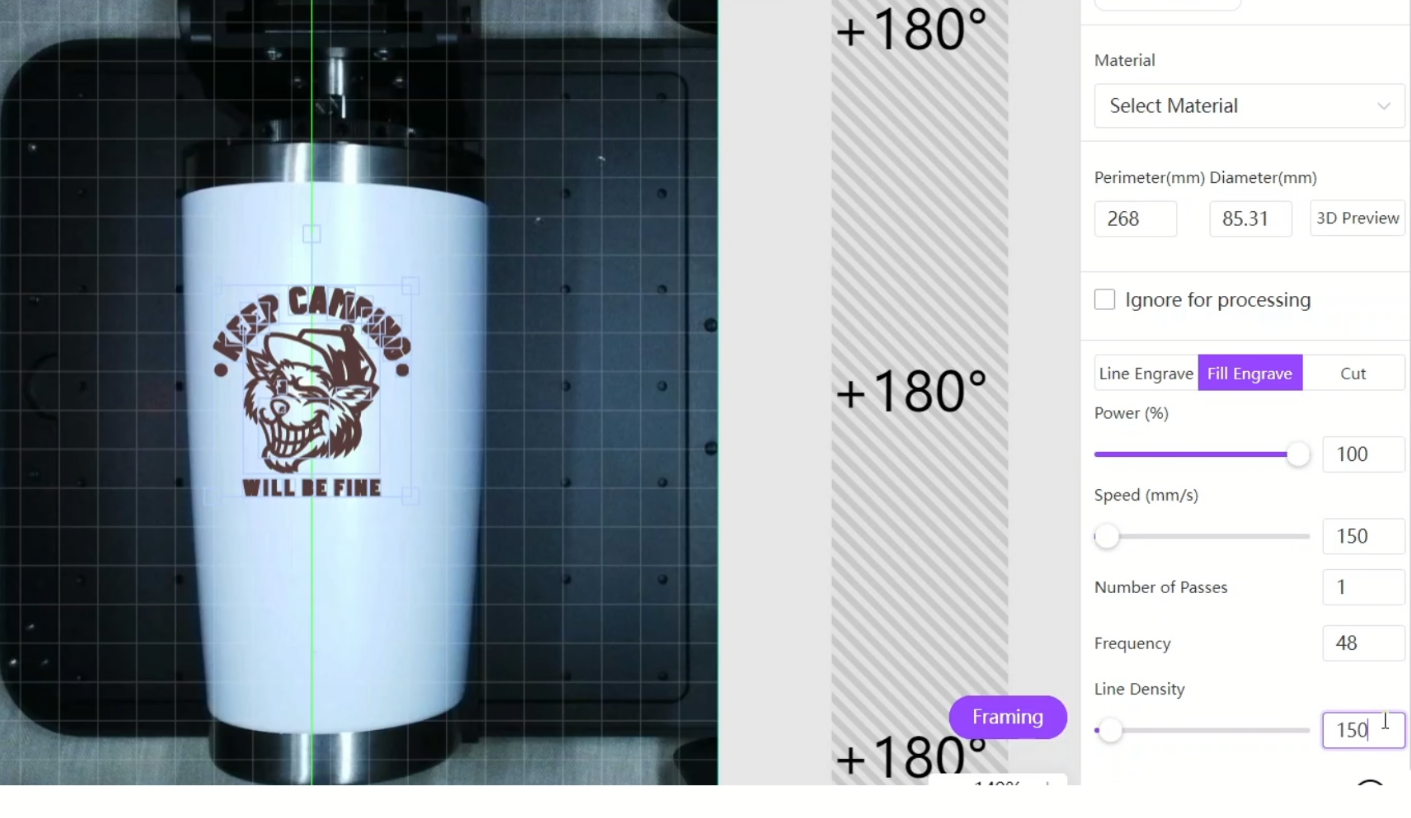
Step 7: Setting Parameters
- Import Design: Click the Import icon in the left-hand toolbar of the MakeIt! software to upload your design (SVG, PNG, or DXF).
- Positioning: Drag your design onto the canvas and resize it if necessary.
- Configure Settings: In the right-hand panel, select your engraving parameters.
Step 8: Framing
- Click Framing: In the software, click the Framing button.
- Verify Alignment: Check whether the movement range of the red dot matches the engraving area.
- If it’s off-center, adjust the design position in the software and frame again.
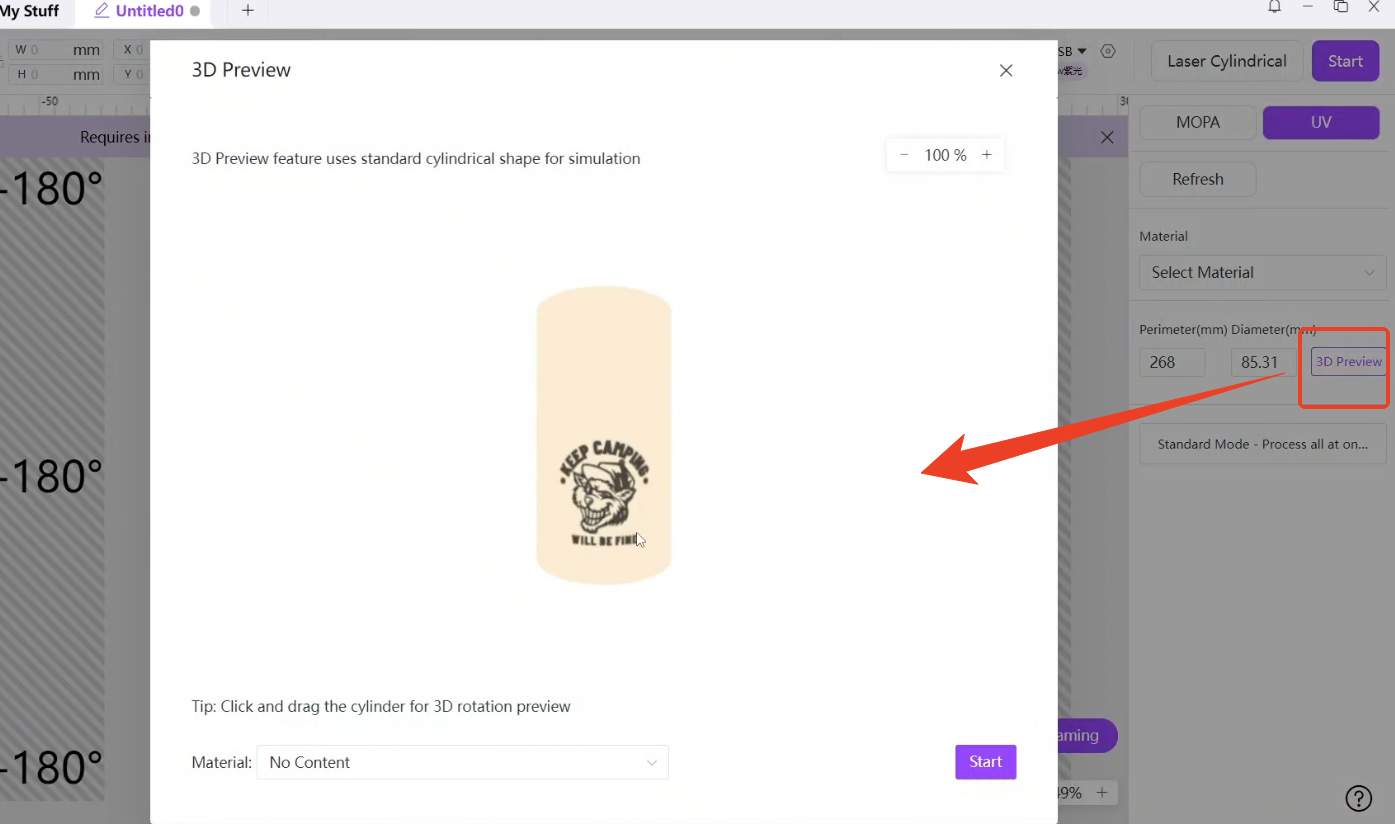
- 3D Preview: You can click 3D Preview to view the preview effect.
Step 9: Engraving
- Start the Job: Click Start, and a warning window will show up and remind you to verify diameter and perimeter. After confirming, click “Continue Processing.” Then click Send.
- Physical Activation: Press the glowing Start button on the Lumos Ultra.
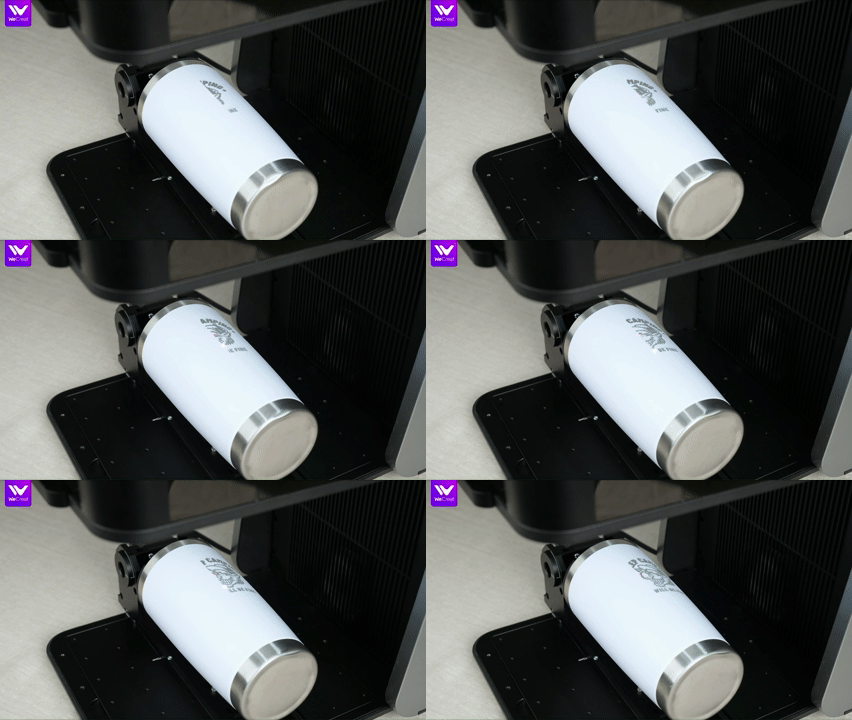
- Monitor the Work: Stay near the machine while it engraves. You will see the rotary chuck spinning the tumbler incrementally as the laser removes the surface coating.

Important Tips & Reminders for Cylindrical Mode
- ⚠️ Don’t Forget the Perimeter: If you change to a different-sized tumbler, you must re-measure the circumference and update the “Perimeter” value in the software, or your design will appear stretched or squished.
- Safety First: While the lid provides protection, always avoid staring directly at the laser point for extended periods.
- Cable Management: Keep the rotary cable off to the side and away from the tumbler to prevent it from getting tangled during rotation.
- Post-Engrave Cleanup: Once the job is done, use a cloth dipped in Isopropyl Alcohol to wipe away the “soot” or residue. This will reveal the shiny stainless steel underneath for a professional look.